Intro to apps
Custom Visibility for Apps
Messages App
Payments App
Services
Invoicing
Subscriptions
Payment Links
Store
Client Billing Experience
Fees & Payment Reconciliation
Files App
Contracts App
Forms App
Helpdesk App
Tasks App
Client Home App
Profile Manager App
Airtable Embed
Calendly Embed
Notion Embed
Google Sheets Embed
ClickUp Embed
Typeform Embed
Youtube Embed
Autoresponder App
Exporter App
QuickBooks Integration
Xero Integration
Other Embeds
Jotform Embed
Power BI Embed
Hubspot Forms Embed
Hubspot Meetings Embed
Miro Embed
Figma Embed
Monday Embed
Canva Embed
Acuity Scheduling Embed
Loom Embed
Google Drive Embed
Google Slides Embed
Google Docs Embed
Google Forms Embed
Looker Studio Embed
Google Calendar Embed
Databox Embed
Trello Embed
Zoom Scheduling Embed
Squarespace Embed
OneDrive Embed
Internal user roles
Understand internal user roles and permissions
Overview 
Internal users are team members that are part of your workspace. We recommend that you give every team member their own internal user account for enhanced permissions and to minimize issues that may arise if there are multiple simultaneous sessions with the same internal user.
Roles
Internal users can be assigned one of two roles: Admin or Staff.
The primary difference is that Admin internal users have access to workspace settings, configuration options, and billing functionality.
Admin Internal Users
Admins have full system access and can:
Access all settings, including domain settings, payout account settings, API settings, customization, and plan settings
Invite and manage other internal users
Configure client access for internal users
Configure Assembly (core) Apps, Embeds, Marketplace Apps, and Custom Apps
Access the Payments App, invoices, products, and Billing tabs on client CRM profiles
Access QuickBooks and Xero integrations
Staff Internal Users
Staff users have limited permissions and cannot access administrative settings or billing functionality.
When a user is assigned the Staff role:
Workspace settings (domain, payouts, API, customization, and plan settings) are hidden
Internal user management and app configuration are not available
The Payments App, invoices, products, and Billing tabs on client CRM profiles are not accessible
QuickBooks and Xero integrations are hidden
Billing-related notifications are turned off
Adding an internal user
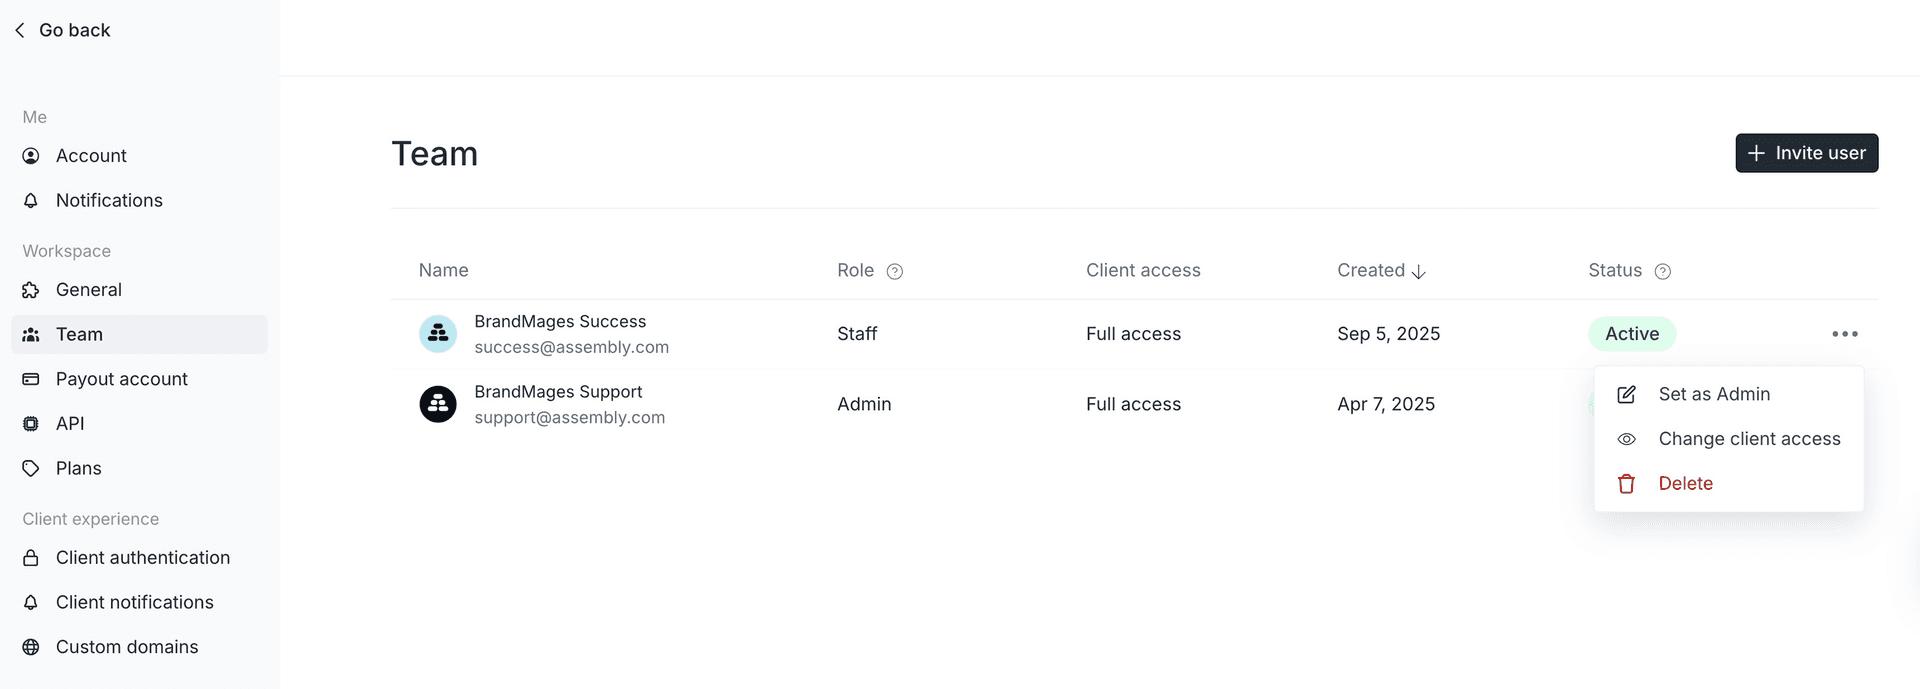
Navigate to the Settings > Team page.
Click on the Invite user button.
Enter the internal user's name, email, and role.
Click Invite.
The invited internal user will now receive an email to accept their invitation.
Removing an internal user
Navigate to the Settings > Team page.
Click on the ellipses(...) shown on the far right of the internal user.
Click Delete.